The calendar
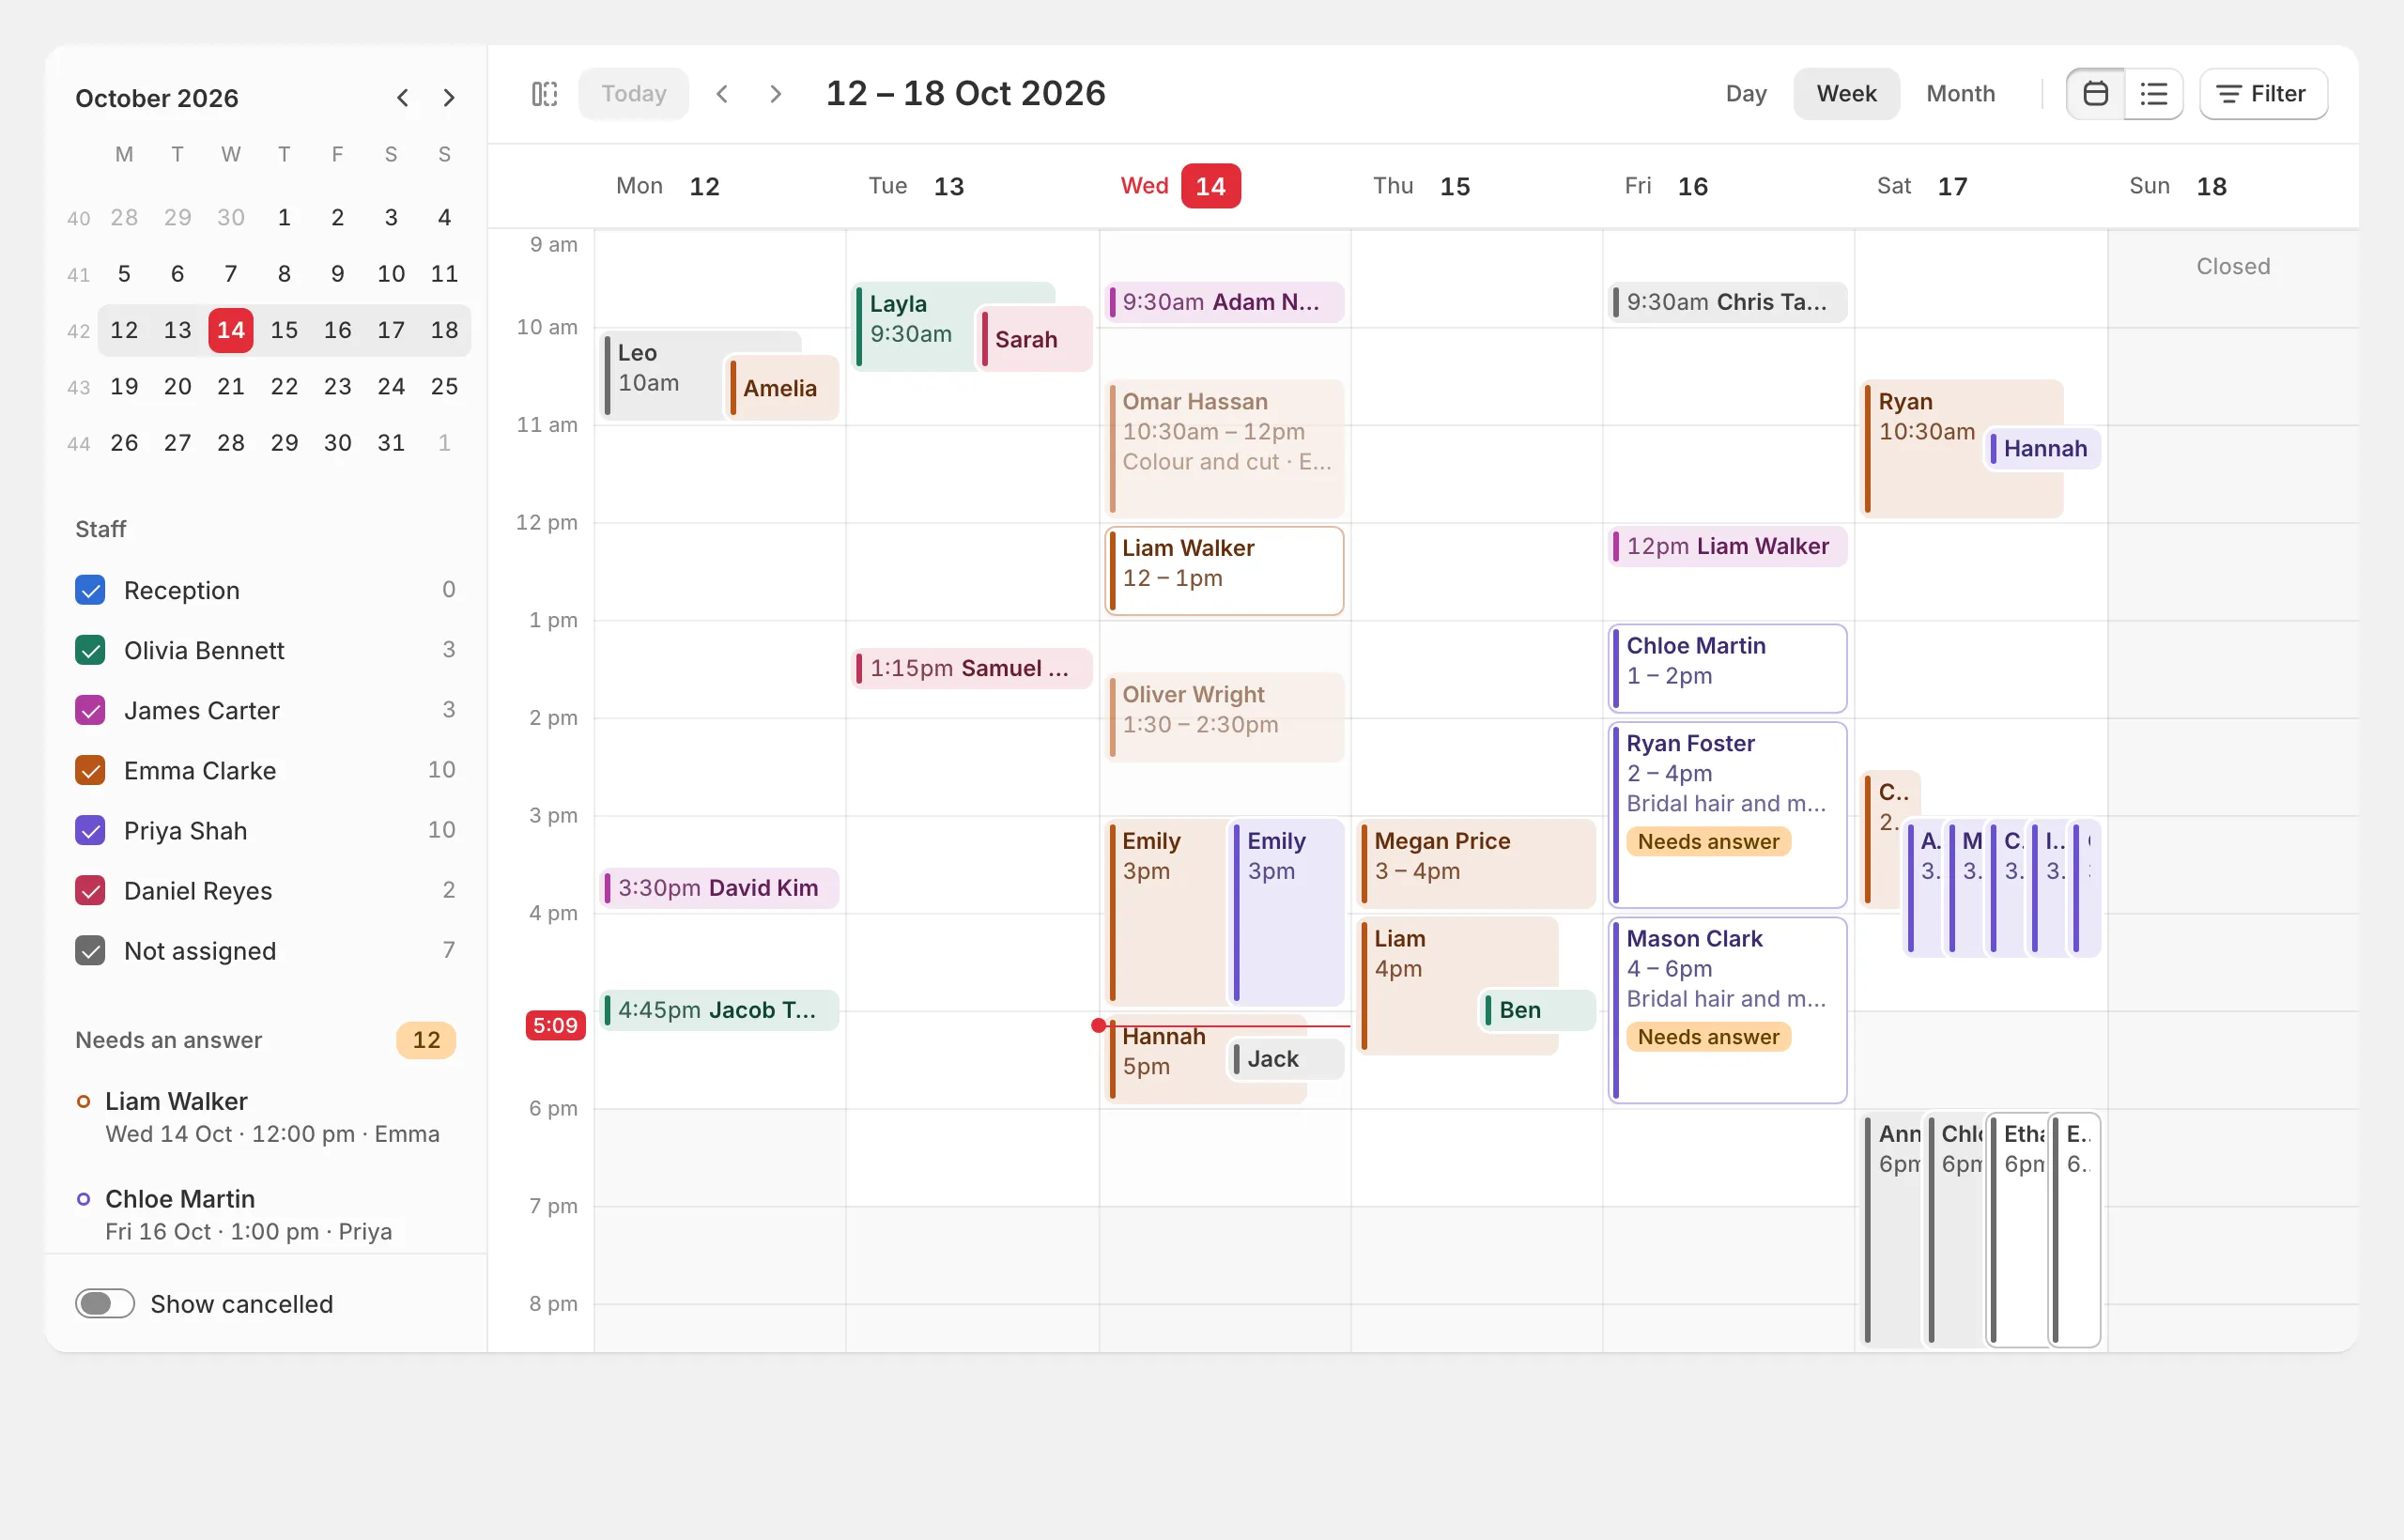
Bookings shows every booking in a calendar inside Shopify admin. Switch between Day, Week, Month and a list. The side column lets you show or hide each person, and lists the requests that need an answer. Press Filter to see one service, location or way of paying.
Click a booking to see everything about it: the customer, what they paid or still owe, their answers to your questions, and buttons to move, cancel or confirm it. Tick Show cancelled to see cancelled bookings too.
Add a booking yourself
For phone calls and walk-ins, press New booking at the top of Bookings.
- Choose the service.
- Choose who it’s with and a free time. You can book any free time, even later today.
- Find the customer, or add a new one. Start typing a name, phone or email to find someone who booked before.
- Check the summary and press Book.
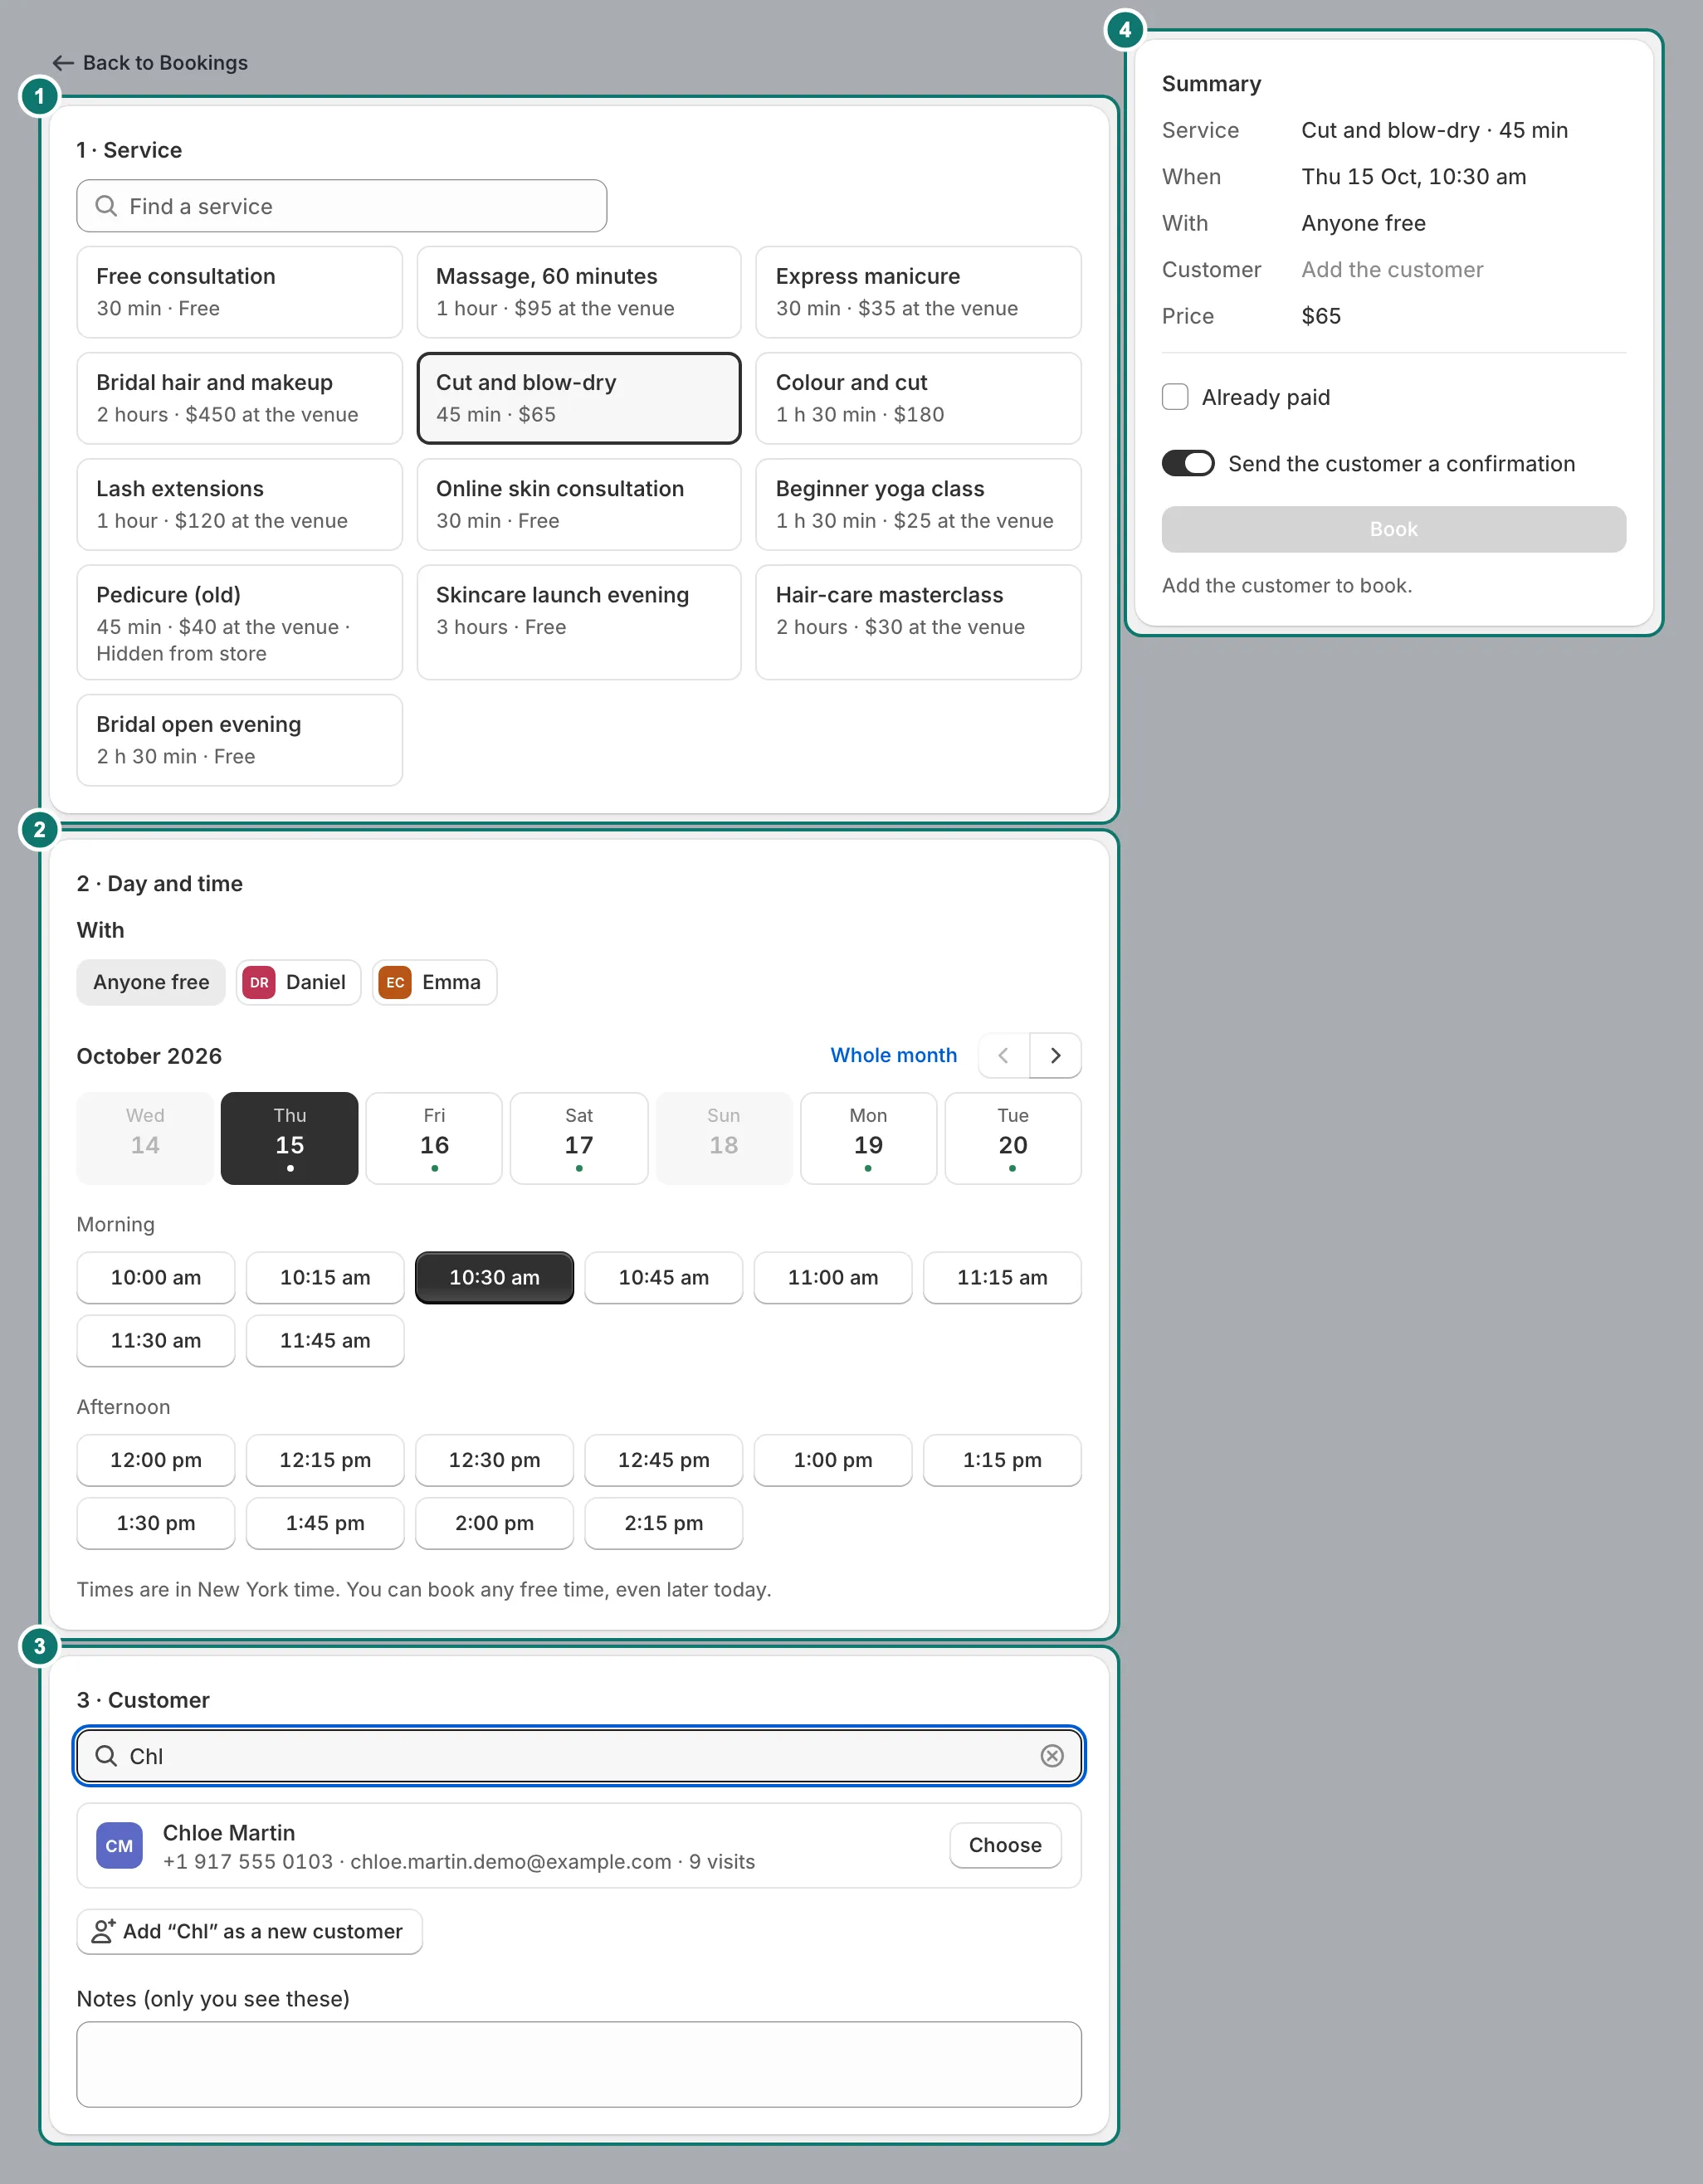
Notes (only you see these) stay with the booking and are never sent to the customer.
Import and export
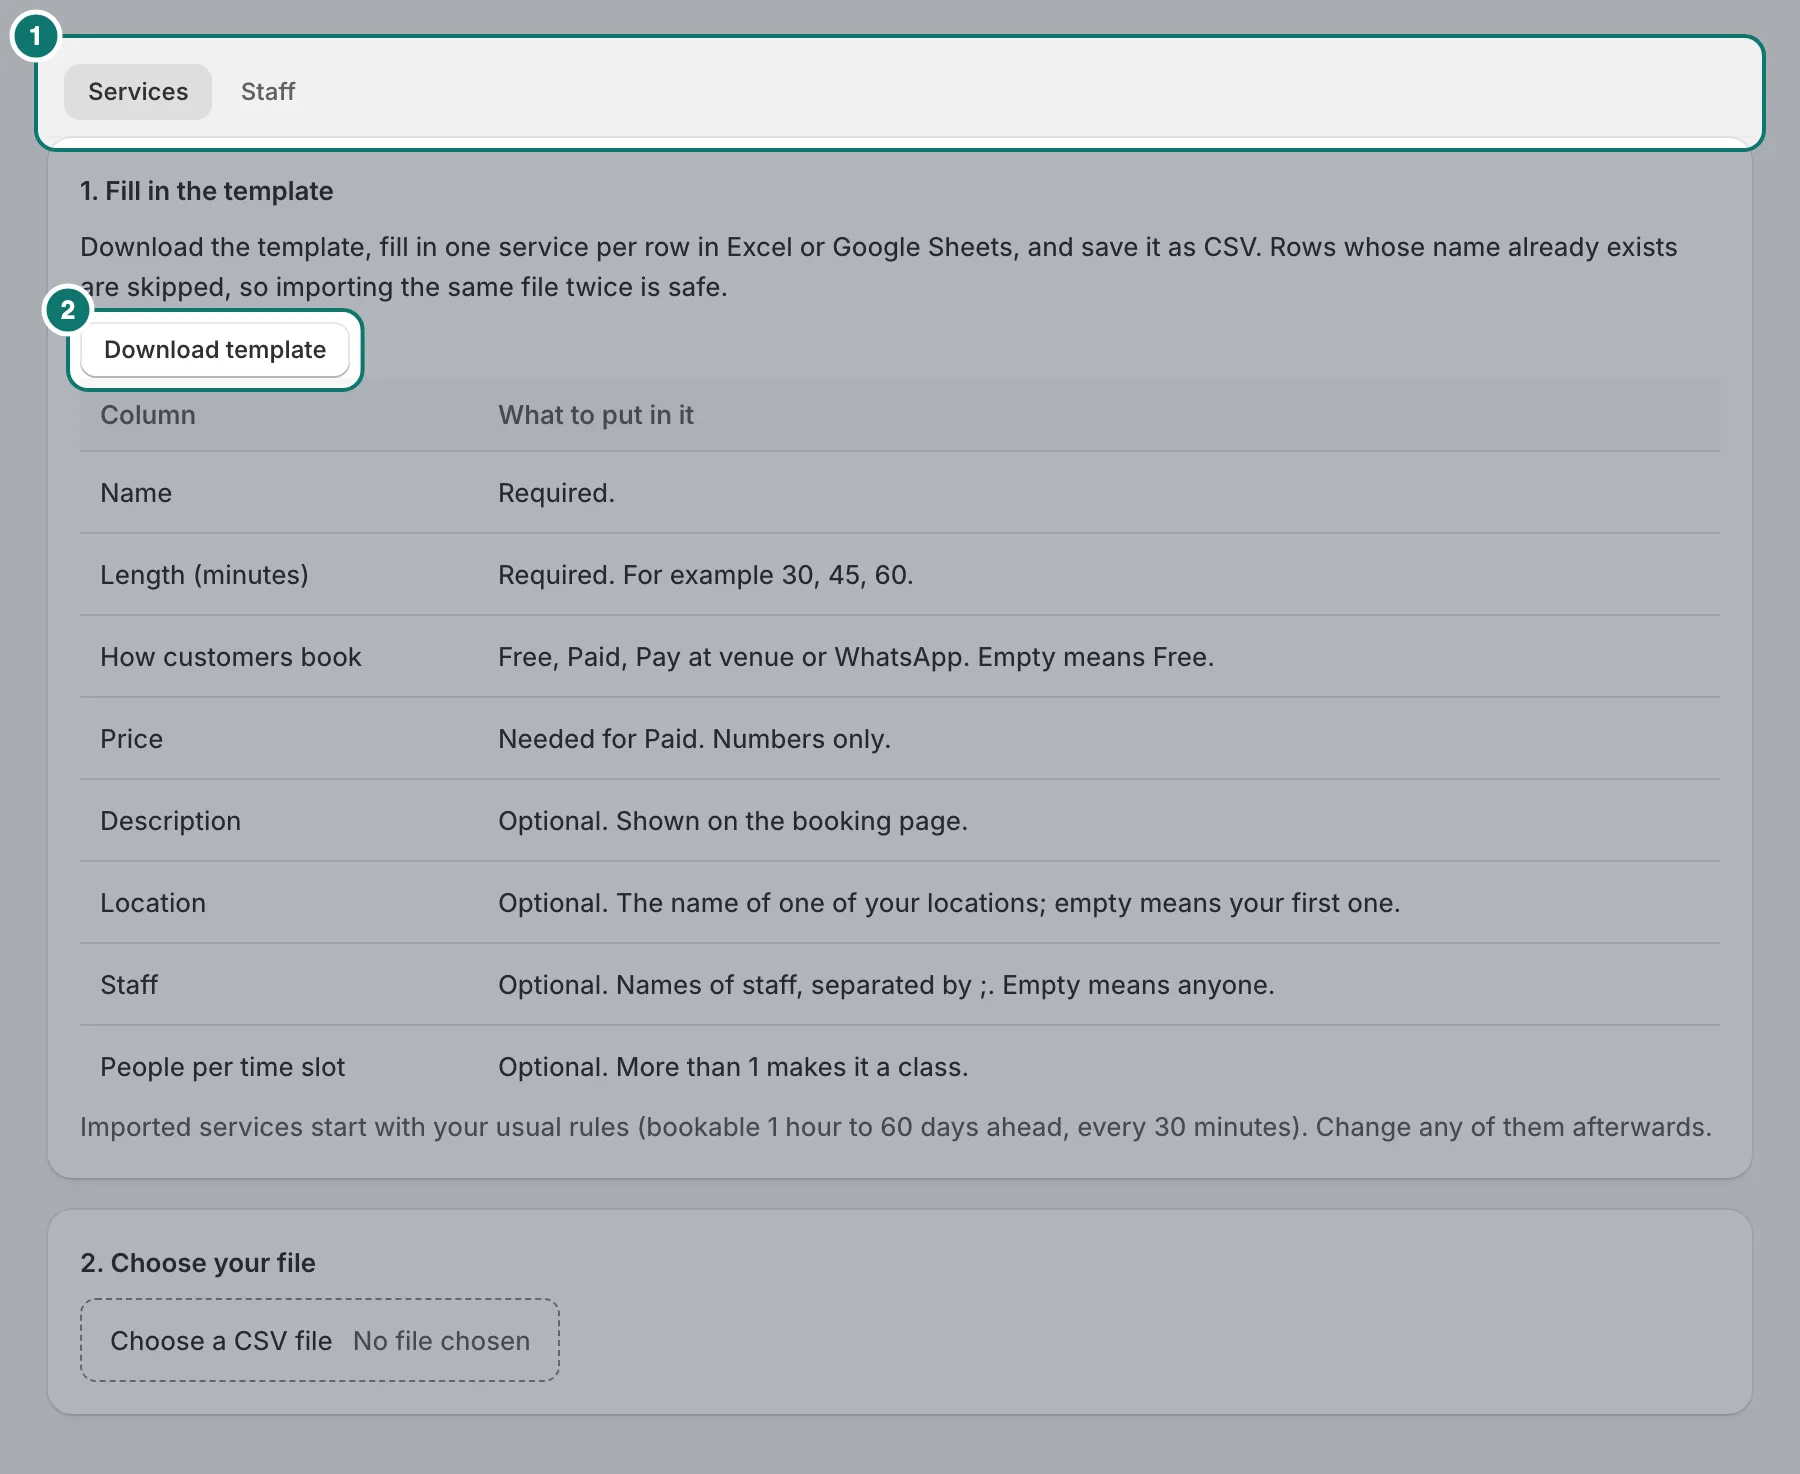
- Import. On Services & events or Staff, press Import. Download the template, fill in one row per service or person in Excel or Google Sheets, save it as CSV and choose the file. Rows whose name already exists are skipped, so importing the same file twice is safe.
- Export. On Bookings, press Export to download your bookings as a spreadsheet (CSV).